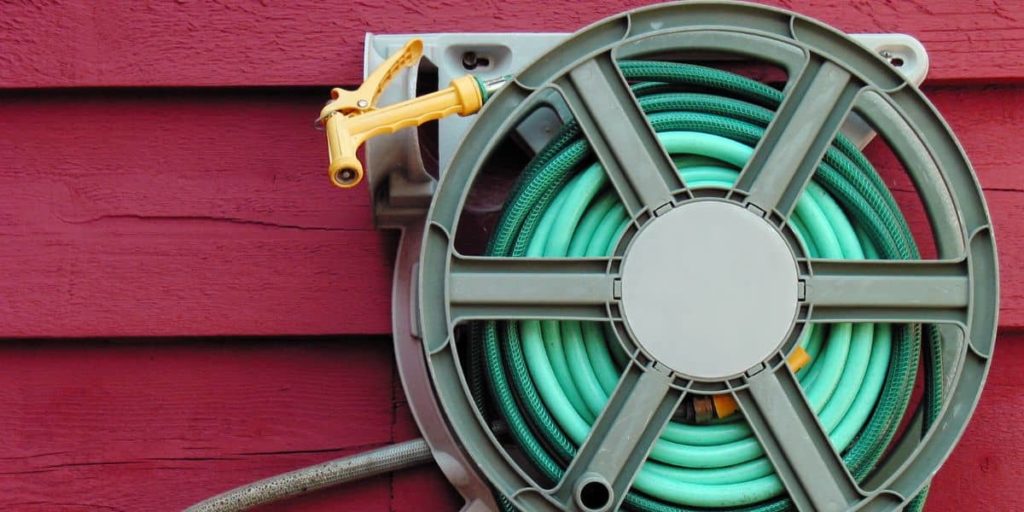
If you are wondering how to mount a hose hanger on siding, in this section we will cover the steps for doing this. You can mount hose reel holders on wood siding by using the hardware suitable for this type of surface.
What Tools Will You Need for Mounting a Hose Reel?
Depending on the hose reel model and functionalities, you might need all or just some of the below installation tools. The manufacturer usually mentions in the user guide what type of tools you will need when installing that specific hose reel. Don’t worry about the extended list as most of the time we already have at least some of these tools in our garage.
To mount a hose reel onto siding you will usually need:
- Phillips screwdriver or an electric drill
- Adjustable Socket Wrench
- Stud Finder
- Spirit level tool
- Pencil or a piece of chalk
What Hardware Is Necessary for The Hose Reel Installation
Even if you will receive the default hardware with the hose reel, such as washers and masonry screws, these are usually of lower quality and overall resistance than the ones you can find at any local hardware store. To ensure the installation of the hose reel will hold for a long period, it is better to purchase the hardware separately, no matter what type of hardware you receive with your hose reel.
For mounting the reel onto vinyl or wood siding, you will need the below hardware:
- Wood Screws – usually 5/16-inch x 2 ½ inch size will do the job
- Washers (5/16-inch)
How To Install a Hose Reel on Wood Or Vinyl Siding
Depending on the model, your hose reel will either have a mounting plate, inbuilt mounting support legs, or a mounting bracket. For the first two options, you can mount the reel directly onto the siding. For the mounting bracket option, it would be better to mount the bracket onto a wooden plate first and then mount it on the siding.
Read more about the different installation options below!
Option 1. Mount the hose reel support directly onto the siding
If you need to install your hose reel holder to wood siding, take the below steps.
1. Locate the wooden studs on your house siding
First, you will need to use a stud finder to locate the position of the studs in your wood siding. This step is mandatory as it is indicated to mount the reel support or reel bracket into the wood studs. If you don’t properly locate the studs and mount the reel randomly into the siding, it can easily fall off and cause damage to the siding.
2. Mark the position of the holes onto the wood siding
Hold the mounting support onto the wall making sure the anchoring holes are located on the wood studs in your siding.
Use a level tool to align the reel wall support into a straight horizontal position. Then, mark the position of each suspension hole from your reel support using a pencil, marker, or a piece of chalk.
3. Drill the holes in the siding using the marks
Once the hole positions are marked, remove the mounting support and start drilling the holes using the marked spots. The hole size should match the wood screw size that you are using. Use an electric drill with ¼ inch wood drill bit.
4. Place the reel mounting support onto the wall
In this step, align the wall holes with the anchoring holes on your hose reel mounting support or bracket. Then add the washers to the wood screws and place each screw into the mounting holes. Tighten each screw using your hands at first and then secure the reel support to the wall by firmly tightening all the screws using an electric drill.
5. Mount the reel onto the installed wall support
This step can include different actions depending on the reel model you purchased. For the hose reels with a mounting plate, you might need to use additional screws to attach the reel to its wall-mounted support. However, other hose reel models have the installation support inbuilt. In this case, no additional action is required, and the installation is completed in step 4.
Always check the manufacturer’s instructions on how to attach and detach the reel from its mounting support.
Option 2. Mounting a hose reel with bracket wall support onto siding using a backing board
When mounting hose reel holders, it is very important to choose a flat surface onto which you attach the reel support. The plain mounting surface ensures the hose reel system will function properly and easily, without damaging the surface against which it is mounted. The reel system weight will be distributed evenly when it is mounted on a flat surface and the mounting surface will not bend or break when the hose reel is in use.
As we know, wood or vinyl siding is not an even, plain surface. However, you can still mount your hose reel against it. By using a simple workaround and attaching a flat backing board onto your siding and then mounting the reel bracket support onto the backing board, the installation can last for years without any risks or damages.
Here is how you can do this type of mounting in a few simple steps:
1. Create a backing board for the reel mounting bracket
To create the backing board for the reel, bracket the most convenient solution is to use a piece of pressure-treated plywood. This type of wood board is available at any local hardware store, and it is chemically treated to endure outdoor climate changes, moisture, and extreme temperatures. To add an additional layer of protection, you can paint it on all sides using waterproof wood paint.
Once you have your piece of treated plywood, place the reel bracket onto it and draw the border of the bracket onto the plywood. Then cut the wood to match the border and paint it for additional weather-proof protection.
2. Mark the bracket holes position onto the backing board
Place again the bracket onto to backing board and mark the anchoring holes of the bracket onto the wood board by using a marker or piece of chalk.
3. Create the bracket anchoring holes into the backing board
Using an electric drill with a wood drill bit, make the bracket anchoring holes in the wood board.
4. Locate the framing stud on your siding
Using a stud find check the siding and locate the framing stud underneath it. You will need to mount the backing board created previously onto the framing stud. Make a mark on the siding where the stud is, at the desired height, in the position where you want to mount your hose reel.
5. Mount the backing board against the siding
Make a second set of marks on the backing board, this time mark 2 holes that you will use to drill in the screws and attach the board to the siding. Make these marks approximately 1 inch from the border of the board, on the top and bottom, and in the middle section of the board.
Place the backing board onto the siding, where you marked the framing stud in step 4, and use a level tool to ensure you position the board in a straight horizontal line.
Keeping the board still, onto the siding, drill two holes in the spots marked earlier using an electric drill with a wood drill bit. The holes will go into the board, then into the siding and framing stud.
Insert the wood screws into the created holes and fasten them to firmly secure the backing board onto the siding.
6. Mount the reel bracket onto the wood board
In this step, add washers to all the necessary wood screws that you will use to fasten the bracket onto the backing board.
Place the bracket on the wall, onto the wood board that you mounted in the previous step. Make sure the bracket anchoring holes match the marks that you created on the wood board in step 2. Then insert the screws into the anchoring holes and fasten each of them using an electric drill.
Read more about garden hose reels here:
- How to Decide Where to Hang a Hose Reel
- What Is a Hose Reel And Why You Need One
- How to Wind a Garden Hose
If you are looking for a garden hose reel holder, check our recommendations below:


