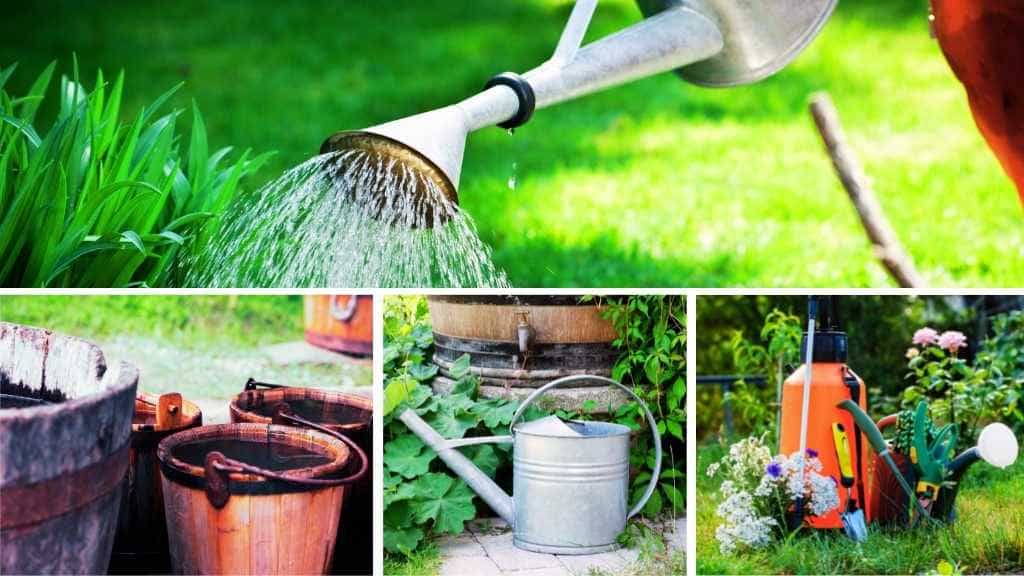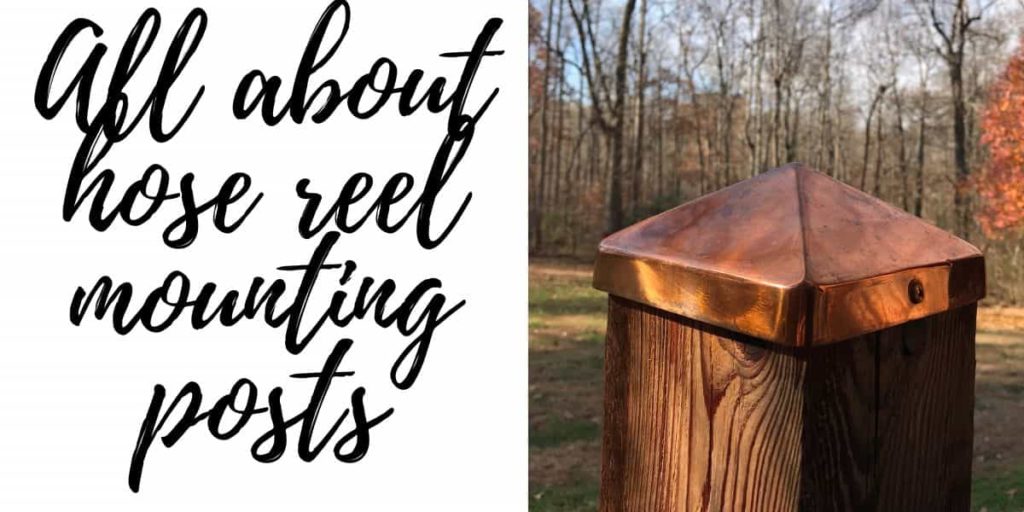
There are several types of surfaces and places where you can mount a garden hose reel holder. Most reel holders are designed for wall mounting setup. However, if you are reluctant in drilling holes into your outdoor walls or siding, a garden hose reel mounting post will be a perfect solution!
In this post, we will cover the steps for mounting a garden hose reel post and then installing a hose reel against the post. Read more about it below!
How do I make a garden hose post?
The most common type of mounting post for a hose reel is the wooden post or the timber post. But on some occasions, metal mounting posts can be used, especially if they were particularly designed to work with your specific hose reel model. First, search your hose reel brand to see if they also include reel mounting posts in their product catalog. In case they don’t, you can easily make your own timber garden hose post by using only a few items that you can purchase at any local tools or hardware store.
Additionally, you can decorate the wooden post after it is mounted to better fit into your outdoor décor.
To make a garden hose mounting post for your water hose reel holder, you will need:
- A ground contact 4×4 or 6×6 wood post or treated timber post. A length of 6 feet post will be sufficient in most cases
- A ground fastening agent. Depending on how you decide to mount the post, this can be:
- Cement
- A cement alternative solution, such as Fast 2K Deck Post Anchor Mix
- A Post Anchor Ground Spike
- A Post Mount Base Plate, for mounting the post into concrete, patios, or decks.
- Mounting tools, as detailed in the wood post installation section below
- Wood Post Decorative accessories, such as:
- Multipurpose Sandpaper or a Sanding Sponge Block
- Exterior Wood Paint
- Wood fixating glue for attaching the decorative accessories – optional
To make your wooden mounting post, first sand it on each side using either sanding paper or a sanding sponge. Then weatherproof the 4×4 or 6×6 wood post by applying one or two layers of weather-resistant wood paint on all sides of the post. Let it dry according to the painting instructions mentioned on the package. If you are using any wood decorative accessories, like a post cap, weatherproof these as well.
Once the painted post gets dry, mount it to the ground by taking the installation steps mentioned in the next section of this post. Choose the installation type from one of the three options mentioned below.
When you finished mounting the post into the ground, attach any decorative accessories to it and fix them into place using wood fixating glue.
The final step is to mount the garden hose reel holder onto the post by takings the steps detailed in the final section of this post.
How to install the hose reel mounting post
In terms of installation and how you can install the mounting post, there are different options that you can choose from.
No matter which type of installation method you use for mounting your hose reel post, all the decorative accessories that you might want to add to your post should be glued onto the post after the installation is completed.
Option 1. Mount the garden hose reel post into the ground by digging a hole
The necessary tools and fastening equipment for this type of post mounting are:
- A post hole digger, a drill auger, or a shovel to dig the hole
- Quick-setting cement mix or a cement alternative solution, such as Fast 2K Deck Post Anchor Mix
- Gravel
- Spray paint for marking the post position
- Spirit Level Tool
To install a mounting post into the ground, take the following steps:
1. Decide on the location of the post and mark the position on the soil
The first step is to decide where to set up the mounting post. No matter where in your garden you choose to install it, always make sure you have your water source at a minimum necessary distance from the wooden post. The distance you choose should allow the hose reel leader hose to easily be mounted to the outdoor spigot, without being stretched to reach the spigot. As your hose reel will be installed on the mounting post, also consider the reel installation height when measuring the distance between the wood post and the spigot. It is best to have no more than 3 feet of distance between the reel mounting post and the spigot.
Mark the position you choose on the ground using spray paint or by making a sign on the soil directly.
2. Dig the hole into the ground
There are several tools you can use for digging the hole for the mounting post, as listed in the tools list above. The difference between them is the level of physical effort that you need to put in when using them. Choose the digging tool that is most convenient for you and start digging a square hole in the position marked in step 1.
Keep in mind that to accommodate the necessary amount of cement to sustain the post, the hole diameter needs to the 3 times the diameter of the wood post.
The depth of the hole should be at least 20 inches.
3. Add a layer of gravel to the hole base and place the wood post into the hole
Adding gravel to the hole base helps water to drain around the post. Make sure the gravel layer is evenly placed on the base of the hole. Then set the wood post into the center of the hole and make sure it is level. You will need someone to help you with holding the post into place while you take the next step of the installation.
4. Add quick-setting cement into the hole, around the post
Fill the hole with quick setting cement making sure the post stays centered. Add the necessary amount of water on top of the concrete, as indicated in the concrete bag instructions. Then use a piece of scrap timber to repeatedly pat the concrete. This will make it compact and will increase its fixating strength. Before the concrete starts to dry, check again to make sure the post is level and correct it to a vertical position if the case.
Alternatively, you can use other solutions for fastening the mounting post into the ground, such as Fast 2k Deck and Fence Post Anchor. This is an expanding composite designed for filling the peripheral void between a post and the hole walls. This solution is designed to adhere to wood, vinyl, and metal posts, as well as the ground better than traditional concrete. It is water resistant and hydrophobic.
You will only need to mix the solution in its bag and then pour it into the hole. The mix will expand and will hold the post into place.
5. Add soil on top of the cement base
After waiting for the necessary amount of time for the cement to get dry, cover the post cement base with soil. This helps it perfectly blend into the garden décor.
6. Add any decorative accessories to your mounting post
If you decided to use any decorative parts, attach these to the wooden post using wood-fixating glue.
This completes the mounting post installation, and you are now ready to start mounting the hose reel holder onto the post!
Option 2. Mount the garden hose reel post into the soil using a spike
The necessary tools and fastening equipment for this type of post mounting are:
- An Easy Spike, also known as a Post Anchor Ground Spike
- A sledgehammer to mount the post spike into the ground
- A scrap piece of 3 x 3” wood
- Spirit level tool
- Bolts for locking, usually included in the easy spike package
- Electric drill or an Adjustable Socket Wrench
If you are not a fan of digging holes into your garden, you can use an easy spike for mounting your hose reel post.
The installation steps are quite easy, but some physical effort is still necessary for placing the post anchor spike into the ground. Before taking any action, make sure the location you choose to mount your post is not over buried water pipes or the community pipeline system.
To install a mounting post using an easy spike, take the following steps:
1. Choose the location where you want to install the wood post
Make sure no pipes are buried into the area where you decided to install the mounting post
2. Place the post anchor in the desired position by gently pushing it into the soil
3. Bury the spike into the ground in a vertical position
To do this, first get a scrap piece of 3 x 3-inch wood and insert it into the post base. Then, using a heavy-duty sledgehammer hit the scrap wood. Repeat this action until the post spike is fully buried into the ground. While hammering, keep measuring with a level making sure the spike is vertically positioned into the ground.
4. Place your post into the easy spike and tighten the bolts to fasten it
The easy spike bolts are usually included in the ground spike package. In case these are not included, use wood-specific hardware, like wood screws, to fasten the wood post onto the post anchor ground spike.
5. Attach any decorative accessories to your mounting post, using wood fixating glue
Option 3. Mounting a post onto a concrete surface
If there is already a concrete patio in the location where you decided to mount a hose reel post, there are other solutions to help you mount the post in that location.
What tools do you need for mounting a post onto a concrete base:
- A Post Mounting Base Plate
- Hammer Drill with concrete drill bits
- Hammer
- Adjustable Socket Wrench
- Bolts for fastening the post to the mounting plate – usually included
- Brick or masonry anchor sleeves, washers, lock washers, and nuts
- A marker or pencil
- A spirit-level tool
Therefore, to install a mounting post onto a concrete surface, the best option is to use a post mounting base plate. Read more about the installation steps below.
- Place the mounting base plate on the concrete, in the location where you want to install the post
- Mark the anchoring holes from the plate onto the concrete, using a marker or pencil
- Remove the base plate and drill the holes. Use a Hammer drill with a concrete bit to drill the anchoring holes into the concrete.
- Place the base plate onto the concrete, making sure the anchoring holes from the place match the ones on the concrete surface.
- Insert the anchor sleeves into the holes and fasten the mounting plate onto the concrete surface. Once the anchor sleeves are set into position, use a hammer to insert them deeper into the concrete. Then use a wrench to tighten them.
- Insert the wood post into the base plate and tighten the plate bolts until the post is fastened.
- Add any decorative accessories to the post and glue them onto the post using special wood glue.
How do you attach a hose reel to the post?
No matter which type of post mounting installation you were choosing, now is time to mount your hose reel onto the installed wood post.
To mount a hose reel onto a wood mounting post, you will usually need:
- Phillips screwdriver or an electric drill
- Adjustable Socket Wrench
- Spirit level tool
- Pencil or a piece of chalk
Necessary hardware:
- Wood Screws – usually 5/16-inch x 2 ½ inch size will do the job
- Washers (5/16-inch)
For installing the post, follow the steps described below:
- Mark the bracket holes position onto the post and make sure it is level.
Place the reel bracket onto to post and mark the anchoring holes of the bracket, using a marker or piece of chalk. Using a level tool make sure the reel bracket is horizontally placed onto the post. - Create the bracket anchoring holes into the mounting post.
Using an electric drill with a wood drill bit, make the bracket anchoring holes in the wood post. - Mount the reel bracket onto the wood post.
In this step, add washers to all the necessary wood screws that you will use to fasten the bracket onto the mounting post. Place the bracket on the post, then insert the screws into the anchoring holes and fasten each of them using an electric drill. - Mount the hose reel onto the bracket.
In this step, all that you need to do is to slide the reel into the bracket as indicated by the manufacturer in the user’s guide.
Read more about garden hose reels here:
- How to Decide Where to Hang a Hose Reel
- What Is a Hose Reel And Why You Need One
- How to Wind a Garden Hose
Hose Reel Mounting Guides:
- How to Install Wall Mounted Hose Reels Onto a Brick or Concrete Wall
- Can You Install a Hose Reel on Wood or Vinyl Siding?
If you are looking for a garden hose reel holder, check our recommendations below: