We postponed the decision of installing a drip irrigation system in our garden as, at first thought, it overwhelmed us. With all the components that need to be set up in the right place and in the perfect order, the entire process just seemed too complex to even consider starting it.
But the truth is, the installation of a drip irrigation line is an easy process once you understand how it works and what is the purpose of all the system pieces that you can find in the irrigation kit. Decide where you need to install it and you will soon understand that this is one of the most efficient and cost-effective watering solutions. It is beneficial for both the plants and the soil, and you can set it up to run automatically.
So it basically takes this responsibility off your shoulders! Sounds interesting? Continue reading below all the main differences between the two types of drip irrigation homeowners use and decide which suits you best!
There are two main types of drip irrigation:
- The drip tubing irrigation system is used mainly to water small areas, small gardens, plant pots, and garden beds. This type of irrigation requires higher water pressure to properly function
- The drip tape irrigation system, which is used for regularly watering large garden areas, vegetable gardens specifically and works best with low water pressure.
A drip irrigation kit comes with several parts that need to be assembled, to hook up all the drip line systems. Each part plays a different role within the watering system. This is why the installation seems difficult and time-consuming, but when you start understanding which of these parts you need to use and how you need to use them, everything becomes clear.
Before reading further, we created a list of optional accessories that could increase the watering efficiency and make the installation process even easier.
Here are the optional tools and parts:
- Hose ground stakes – use them to hold the supply tubing in the place where you need it
- Tubing Cutter Tool – use it to cut the tubing to the length that you need
- Hose Hole Punch Tool – use it to easily make the holes in the supply tubing
- Shut off valves – install the valve from the beginning in case an area of the garden has different watering needs compared to another area of your garden
- Hose splitter connection – a very useful connector that you can attach to the hose bib. This is a very practical way to use the outdoor water source as you can connect the irrigation system to one end of the splitter and the regular garden hose to the other end.
- Water timer – install it to automatically start the irrigation system in the garden at certain hours and for certain periods of time.
What does a drip tubing irrigation kit mean?
The drip tubing irrigation kit uses a tube for distributing the water evenly across the entire length of the irrigation system.
Going forward, we detail the main parts of a drip tubing irrigation system kit.
1. Supply tubing roll
The supply tubing roll is the larger size tubing from the kit package, also named the mainline. It is used to get the water from the hose bib or faucet to your garden.
This is the main water tube of the irrigation system, that is laid throughout the main lines of the area that needs watering. It can come in different sizes but the most common one is the ½ inch.
2. Emitter tubing roll also called feeder tubing or spaghetti line
The emitter tubing roll is also called feeder tubing or spaghetti line.
It is the smaller size tubing from the drip irrigation kit package. It is used to direct the water from the supply tubing to an individual plant. Usually, it comes in a ¼-inch size and you must cut the necessary length that is needed to get the water from the supply tubing to the respective plant.
In some kits, this tubing has inbuilt emitters throughout its length, at a few inches distance from one another. In such cases installation is even quicker as you would just need to lay out the drip tubing on the desired surface and place a cap fitting at each tubing end.
3. Drip emitter heads or drippers
Drip emitter heads or drippers will drip when the water supply is on. They are differentiated depending on the watering drip capacity which is measured in gallons per hour.
The smallest capacity we found was for ½ gallons per hour. You can also find higher capacity drip emitters that can drip around 2 gallons per hour. These are used for watering mature plants which normally have increased watering needs. The emitter heads are installed at the end of the emitter tubing. The kit can contain one or several sizes of emitter heads. Throughout the drip watering system, you can either use the same emitter size or combined emitter sizes depending on the different watering needs of your plants.
As an alternative, if the kit contains a single emitter size, you can connect two emitters to drip water to a plant that has higher watering needs. You can do this by using connector couplings which are usually included in the kit.
4. Sprinkler or sprayer emitter nozzles
Sprinkler or sprayer emitter nozzles can be used instead of the dripper heads. They connect to the drip tubing in the same way but they spray the water in different patterns.
5. Single Connectors
¼-inch single connectors are used to connect the emitter tubing (smaller tubing) to the supply tubing (larger tubing).
6. Tube splitter connectors for the drip tubing
¼-inch tube splitter connectors for the drip tubing are used to attach an additional drip tubing line to an already installed drip tubing line.
This is the purpose of the T shape connectors that you may find in the drip kit. You can also attach this type of splitter connector to the mainline and connect two or four drip tubing lines to the main tubing line.
7. Splitter fittings for the main line tubing
Splitter fittings for the mainline tubing can come in different shapes, like a corner, coupler, or T shape, and are used to connect two or three main supply tubing. Very useful in case you need to guide the tubbing around corners or in different shapes depending on how the irrigation layout is designed.
8. Goof plug connectors
Goof plug connectors are ¼-inch size connectors that are used to plug a hole in the supply tubing. You will need them in case you created that hole by mistake, or you just don’t want to use it anymore.
9. End cap connectors
The end cap connector is a connector that should be attached to the end of the supply tubing. Its purpose is to keep the water within the irrigation system, and direct it to the drip tubbing and then through the drip emitters.
10. Hose adaptor
A Hose adaptor is used for connecting the supply tubing to the hose bib or garden hose. In order words, it is used to connect the supply tubing to the water supply.
On one end it has a standard threaded end that you need to fasten onto the hose bib, and on the other side it has a fitting that connects to the supply tubing, by simply pushing the tubing on.
11. Pressure regulators
The pressure regulator fitting is used to reduce the water pressure in the watering system. It also has a filter screen inbuilt, so it prevents any water debris or other particles to run into the irrigation system and potentially clog the drippers.
High pressure can cause the different parts of the drip irrigation system to pop out of their place. Constant medium-low pressure is needed for the drip system to properly work.
The pressure reducer should be connected between the mainline tubing and the water source, usually directly to the hose bib. Then attach the above-mentioned adaptor connector to the other end of the pressure reducer, and then the supply tubing.
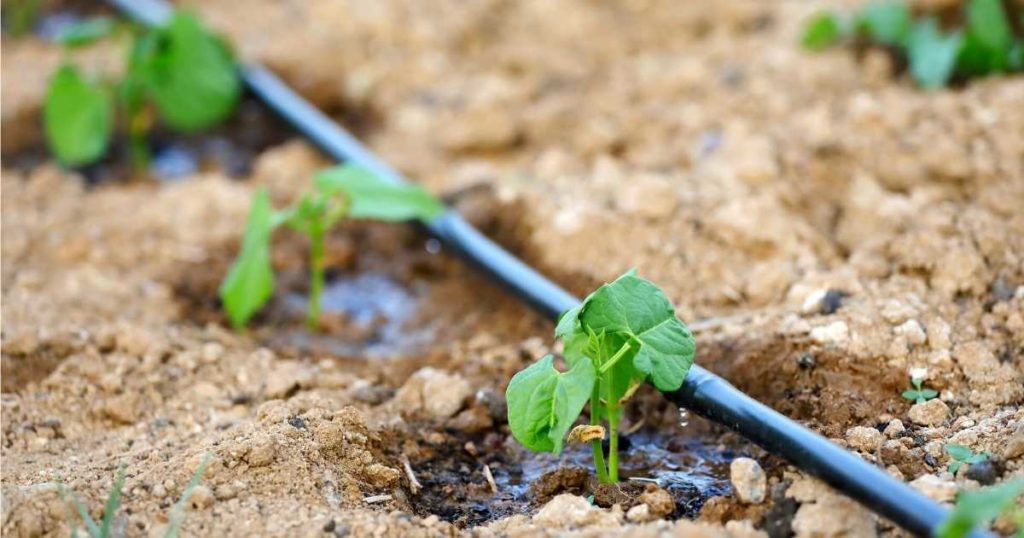
What does a drip tape irrigation kit mean?
The drip tape irrigation kit uses a flat type of tubing, which resembles tape, to distribute the water in the system.
The main parts of a drip tape irrigation system kit are:
1. Mainline supply tubing roll
- Mainline supply tubing roll – this is the tubing that is used to get the water from the outdoor hose bib to the garden or the area where the irrigation system is installed. It is usually placed on the lateral side of the garden surface, in a straight line. Holes are going to be poked into the tubing to connect the drip tape.
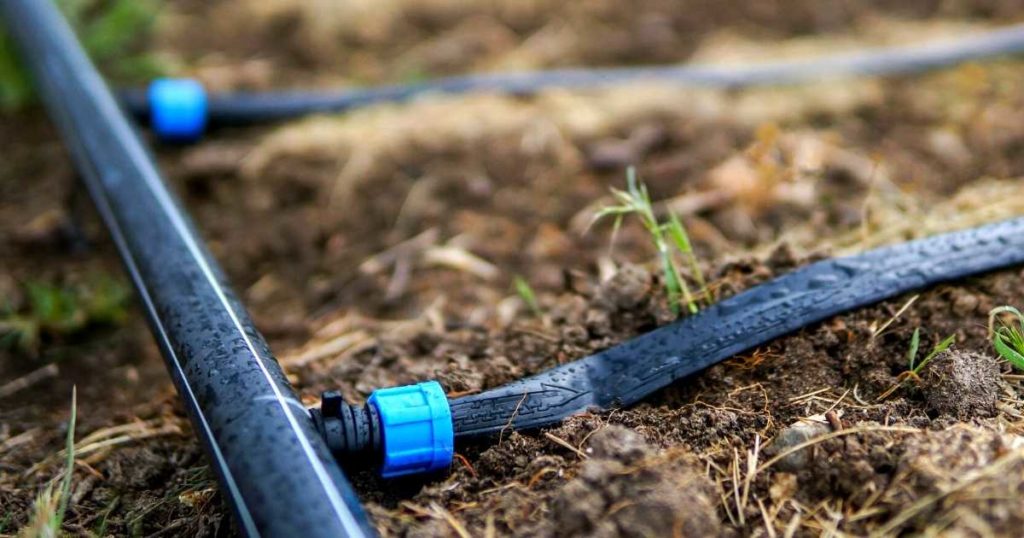
2. Drip tape
- Drip tape – this is the flat hose roll with inbuilt drippers across its entire length. There is usually a line marked on one side of the drip tape, to flag that on that side the water will drip. The drip tape is installed across the garden area, in straight lines, with the dripper line facing upwards. On one end it is attached to the mainline tubing and on the other end of the garden bed, it is hooked with a tape end cap, to prevent water from draining.
3. Female hose connector
- Female Hose Thread connector – this connector is used to connect the mainline to the hose bib, or to a garden hose, in case the outdoor faucet is not close to the area where the irrigation system is installed.
4. Pressure Regulator
- Hose Thread Pressure Regulator – the pressure regulator is important keeps the system properly working. High water pressure is not recommended for this type of irrigation system, so a pressure-reducing valve solves this problem. It is installed between the mainline tubing and the hose bib, or garden hose, depending on which water source you use.
5. Tape end cap
- Tape end cap – this is a connector that must be attached to the end of each drip tape line, after the necessary length of tape has been installed. Its purpose is to keep the water within the system and direct it to the drippers.
6. Tubing end cap
- Tubing end cap – this is a connector that should be attached at the end of the main supply tubing. One end of the tubing is connected to the water supply, and on the opposite end, the cap should be attached to keep the water within the irrigation system.
7. Shut-off valves
- Shut-off valves – are small individual valves that should be connected between the mainline tubing and the drip tape lines. This provides greater control on how much water you run through each drip tape. It also allows you to shut off some drip lines and run the water only through specific drip tape lines.
Conclusion
In this post, we described two of the quickest to-install types of irrigation systems. These are successfully used by most homeowners: drip tubing and drip tape irrigation.
Both types of irrigation kits include a multitude of components and, in this post, we aimed to bring more clarity on what each type of component is used for. This makes the entire planning and system installation more process clear and easy.